This module assumes you have already launched the game locally, by following the setup instructions.
In previous modules we:
- Wrote HTML and CSS to improve the homepage
- Fixed a physics bug in the core of the game's physics engine
- Fixed an interactions bug through an logic refactor
- Did a DRY refactor across many components
- Built a more complex feature using specifications
Now we are going to use Kiro to setup an automation that will help remove boilerplate work involved with coding this game.
Understand the problem
Open the file client/src/systems/preloader-system.ts.
This file is a standalone system which ensures that all the
game assets are preloaded prior to the game starting. It has
a few clever features like initiating the predownload while the
user is still on the authentication screen, and detecting
new assets to load via server events.
But the preloader system also relies on a list of static assets
that is imported from /client/src/assets/index.ts. The
preloader system is fully decoupled from the game components
themselves. This is a clean design that ensures that individual
game components don't have to manually implement calls to
the preloader.
However it introduces a potential issue: a developer could add a new game component, with new asset(s), and forget to add them to the list of static assets for the preloader. Let's add an automated hook that can help avoid this, while also saving the game devs some time.
Create an asset indexer hook
Click the ghost icon in your IDE sidebar to open the Kiro panel. Locate the "Agent Hooks" section and click the plus icon to start writing a new hook.
Let's use a custom prompt for the hook. You can type in natural language to describe what you want to happen. For example:
When a file is created in the assets folder,
ensure that the assets folder index.ts file is
appropriately updated
Loading image...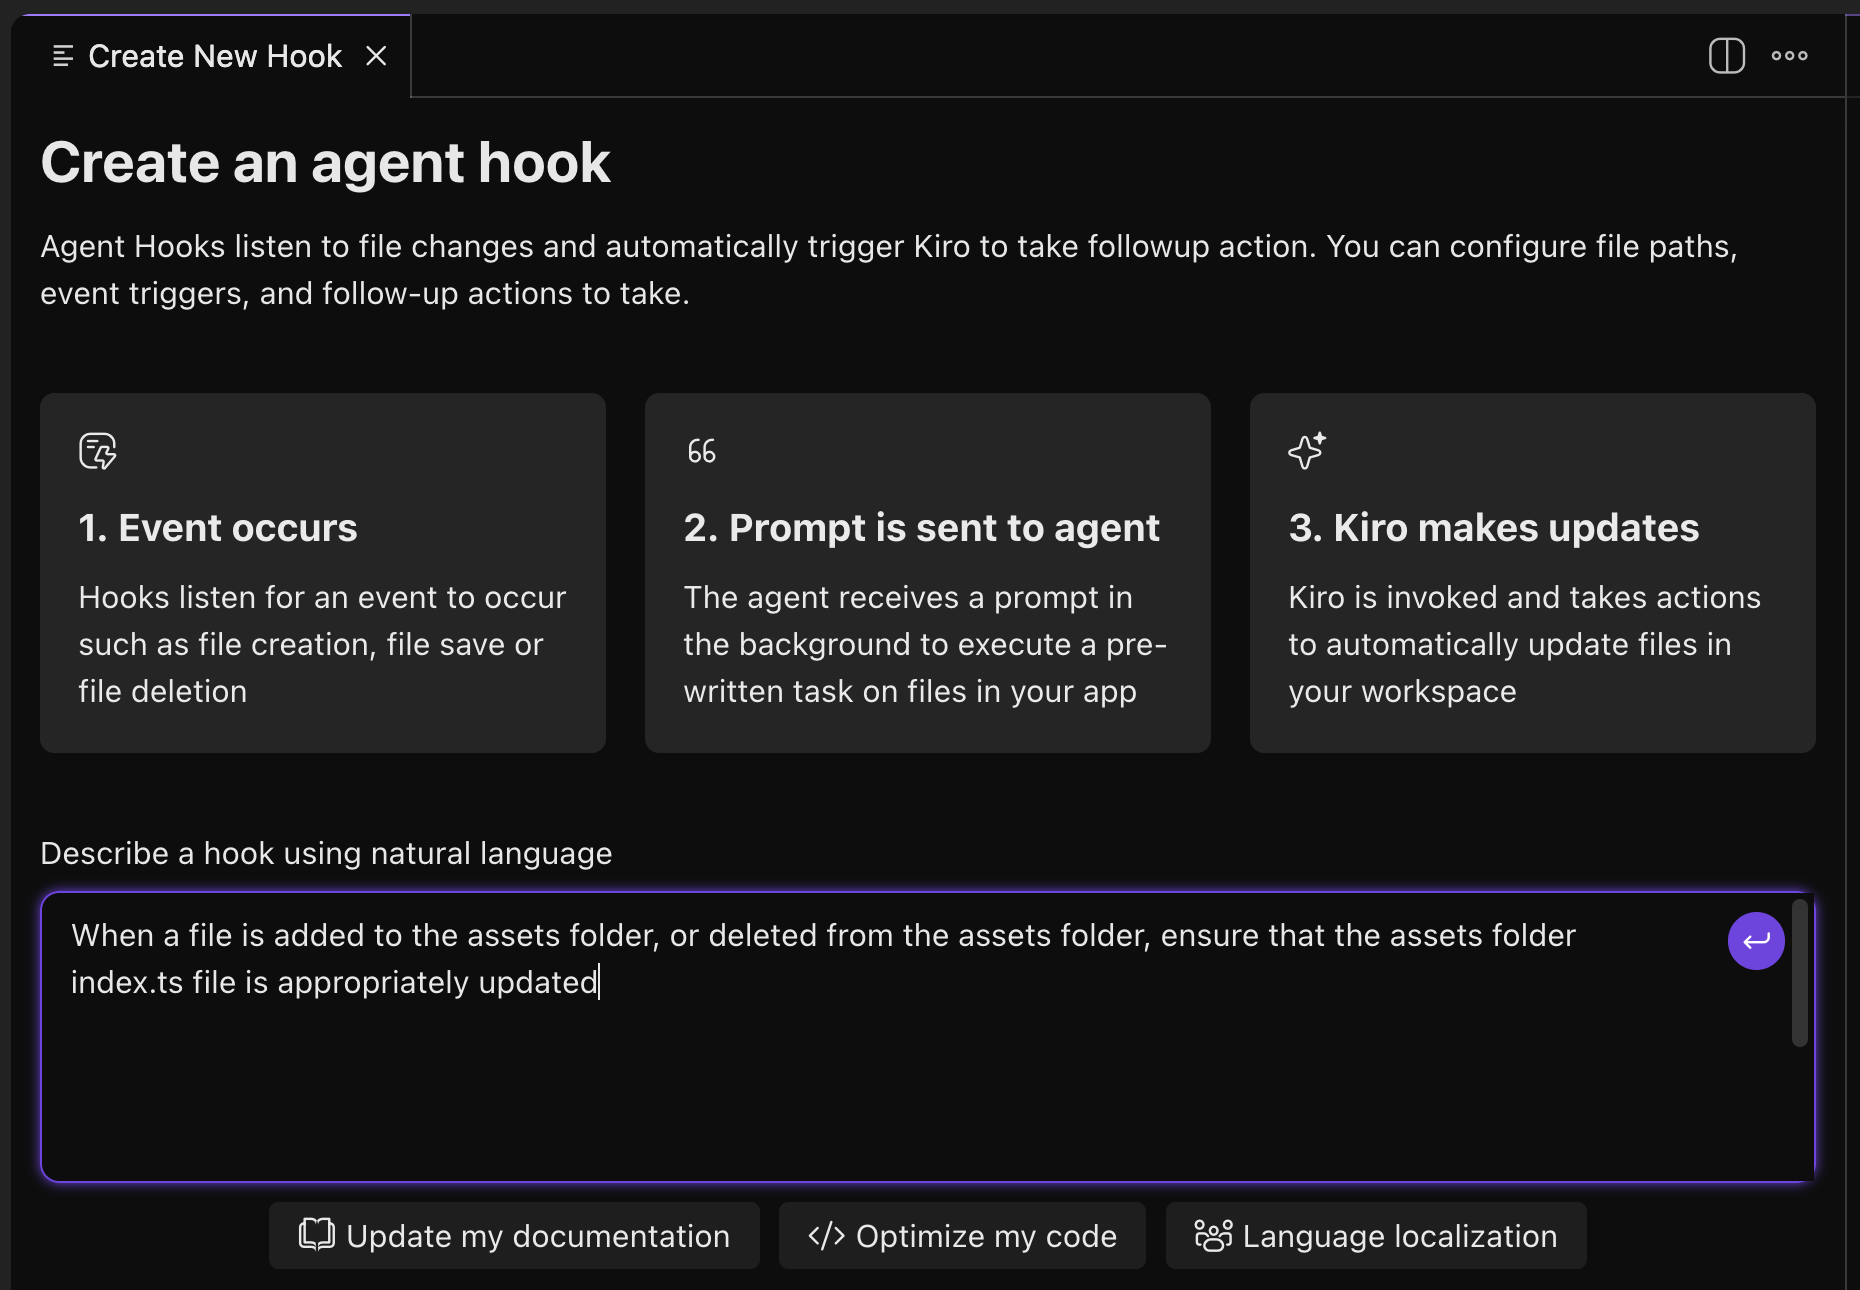
Kiro will expand your natural language query into an agent
hook configuration for the behavior you described. The hook
will be stored in your .kiro/hooks folder. It should
look something like this:
Loading image...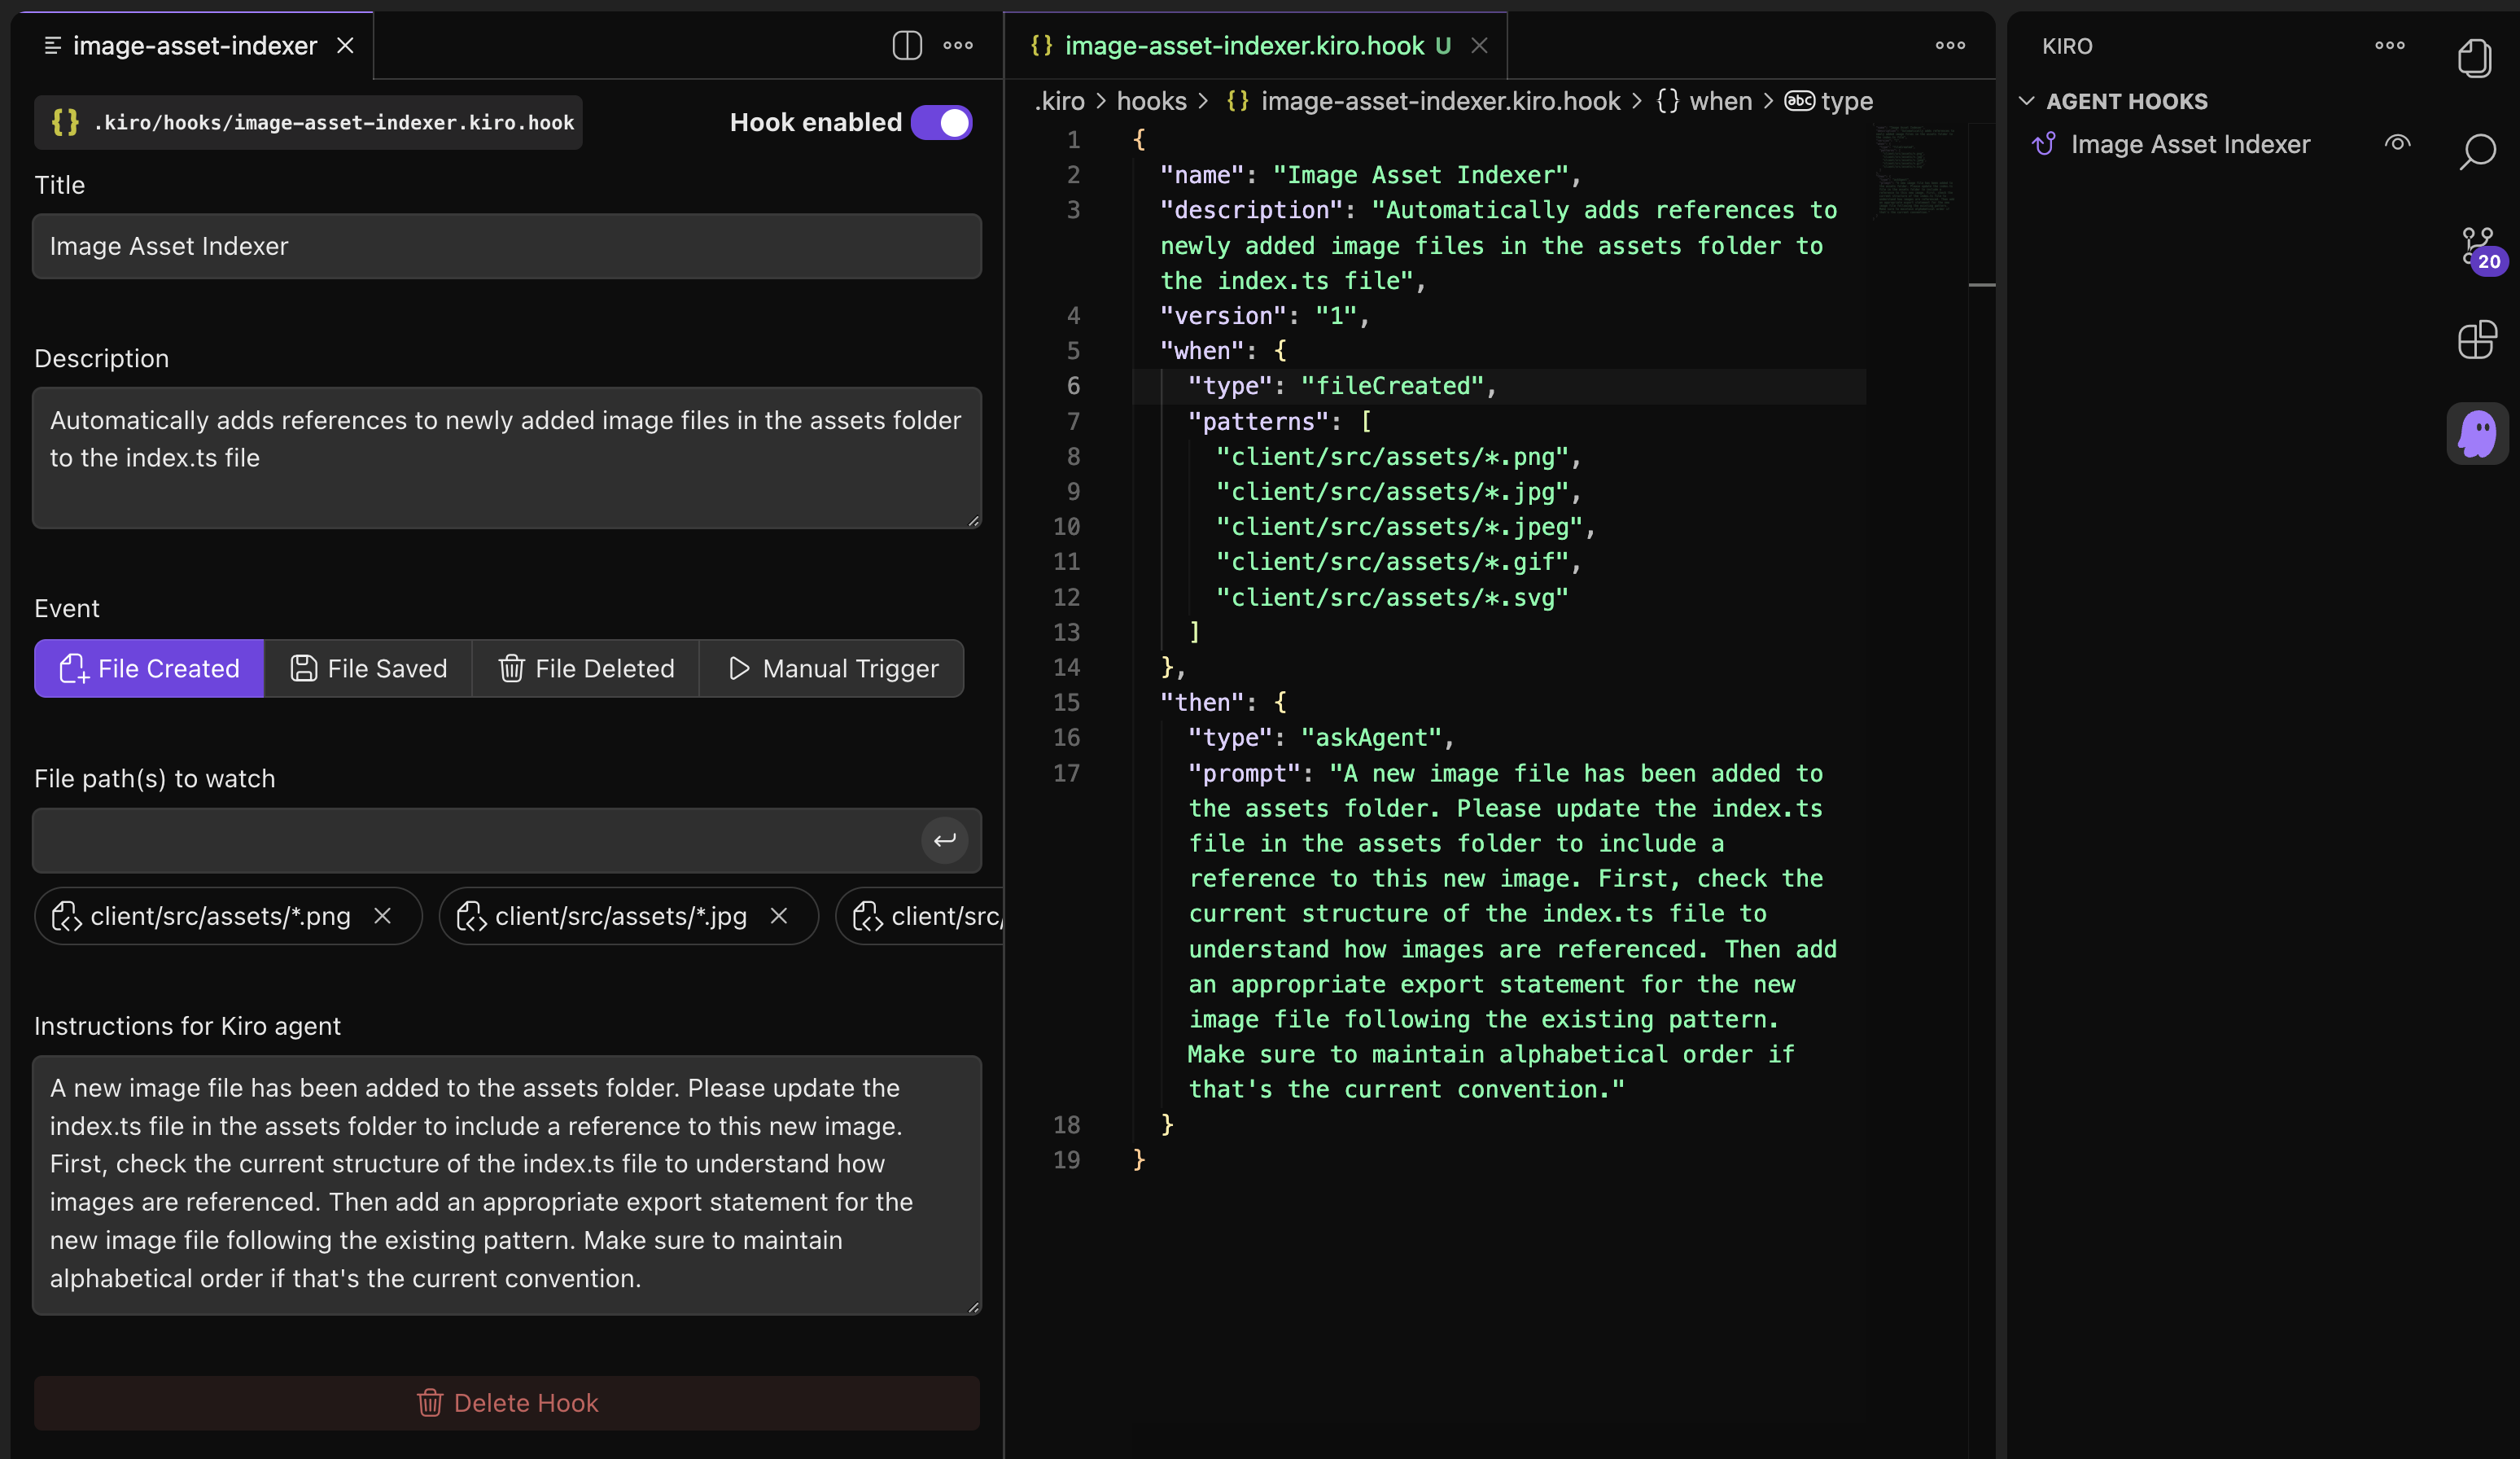
{
  "name": "Image Asset Indexer",
  "description": "Automatically adds references to newly added image files in the assets folder to the index.ts file",
  "version": "1",
  "when": {
    "type": "fileCreated",
    "patterns": [
      "client/src/assets/*.png",
      "client/src/assets/*.jpg",
      "client/src/assets/*.jpeg",
      "client/src/assets/*.gif",
      "client/src/assets/*.svg"
    ]
  },
  "then": {
    "type": "askAgent",
    "prompt": "A new image file has been added to the assets folder. Please update the index.ts file in the assets folder to include a reference to this new image. First, check the current structure of the index.ts file to understand how images are referenced. Then add an appropriate export statement for the new image file following the existing pattern. Make sure to maintain alphabetical order if that's the current convention."
  }
}
Create an asset removal hook
Now that we have an example template for an agent hook, you can also
create new hooks manually by just creating new files in the .kiro/hooks folder.
Let's try this out by cloning the asset indexer hook and editing it into
an asset removal hook. Copy the existing hook and paste it as image-asset-remover.kiro.hook with
content like this:
{
  "name": "Image Asset Remover",
  "description": "Automatically removes references to newly deleted image files in the assets folder to the index.ts file",
  "version": "1",
  "when": {
    "type": "fileDeleted",
    "patterns": [
      "client/src/assets/*.png",
      "client/src/assets/*.jpg",
      "client/src/assets/*.jpeg",
      "client/src/assets/*.gif",
      "client/src/assets/*.svg"
    ]
  },
  "then": {
    "type": "askAgent",
    "prompt": "An image file has been removed from the assets folder. Please update the index.ts file in the assets folder to remove any references to this removed image."
  }
}
Loading image...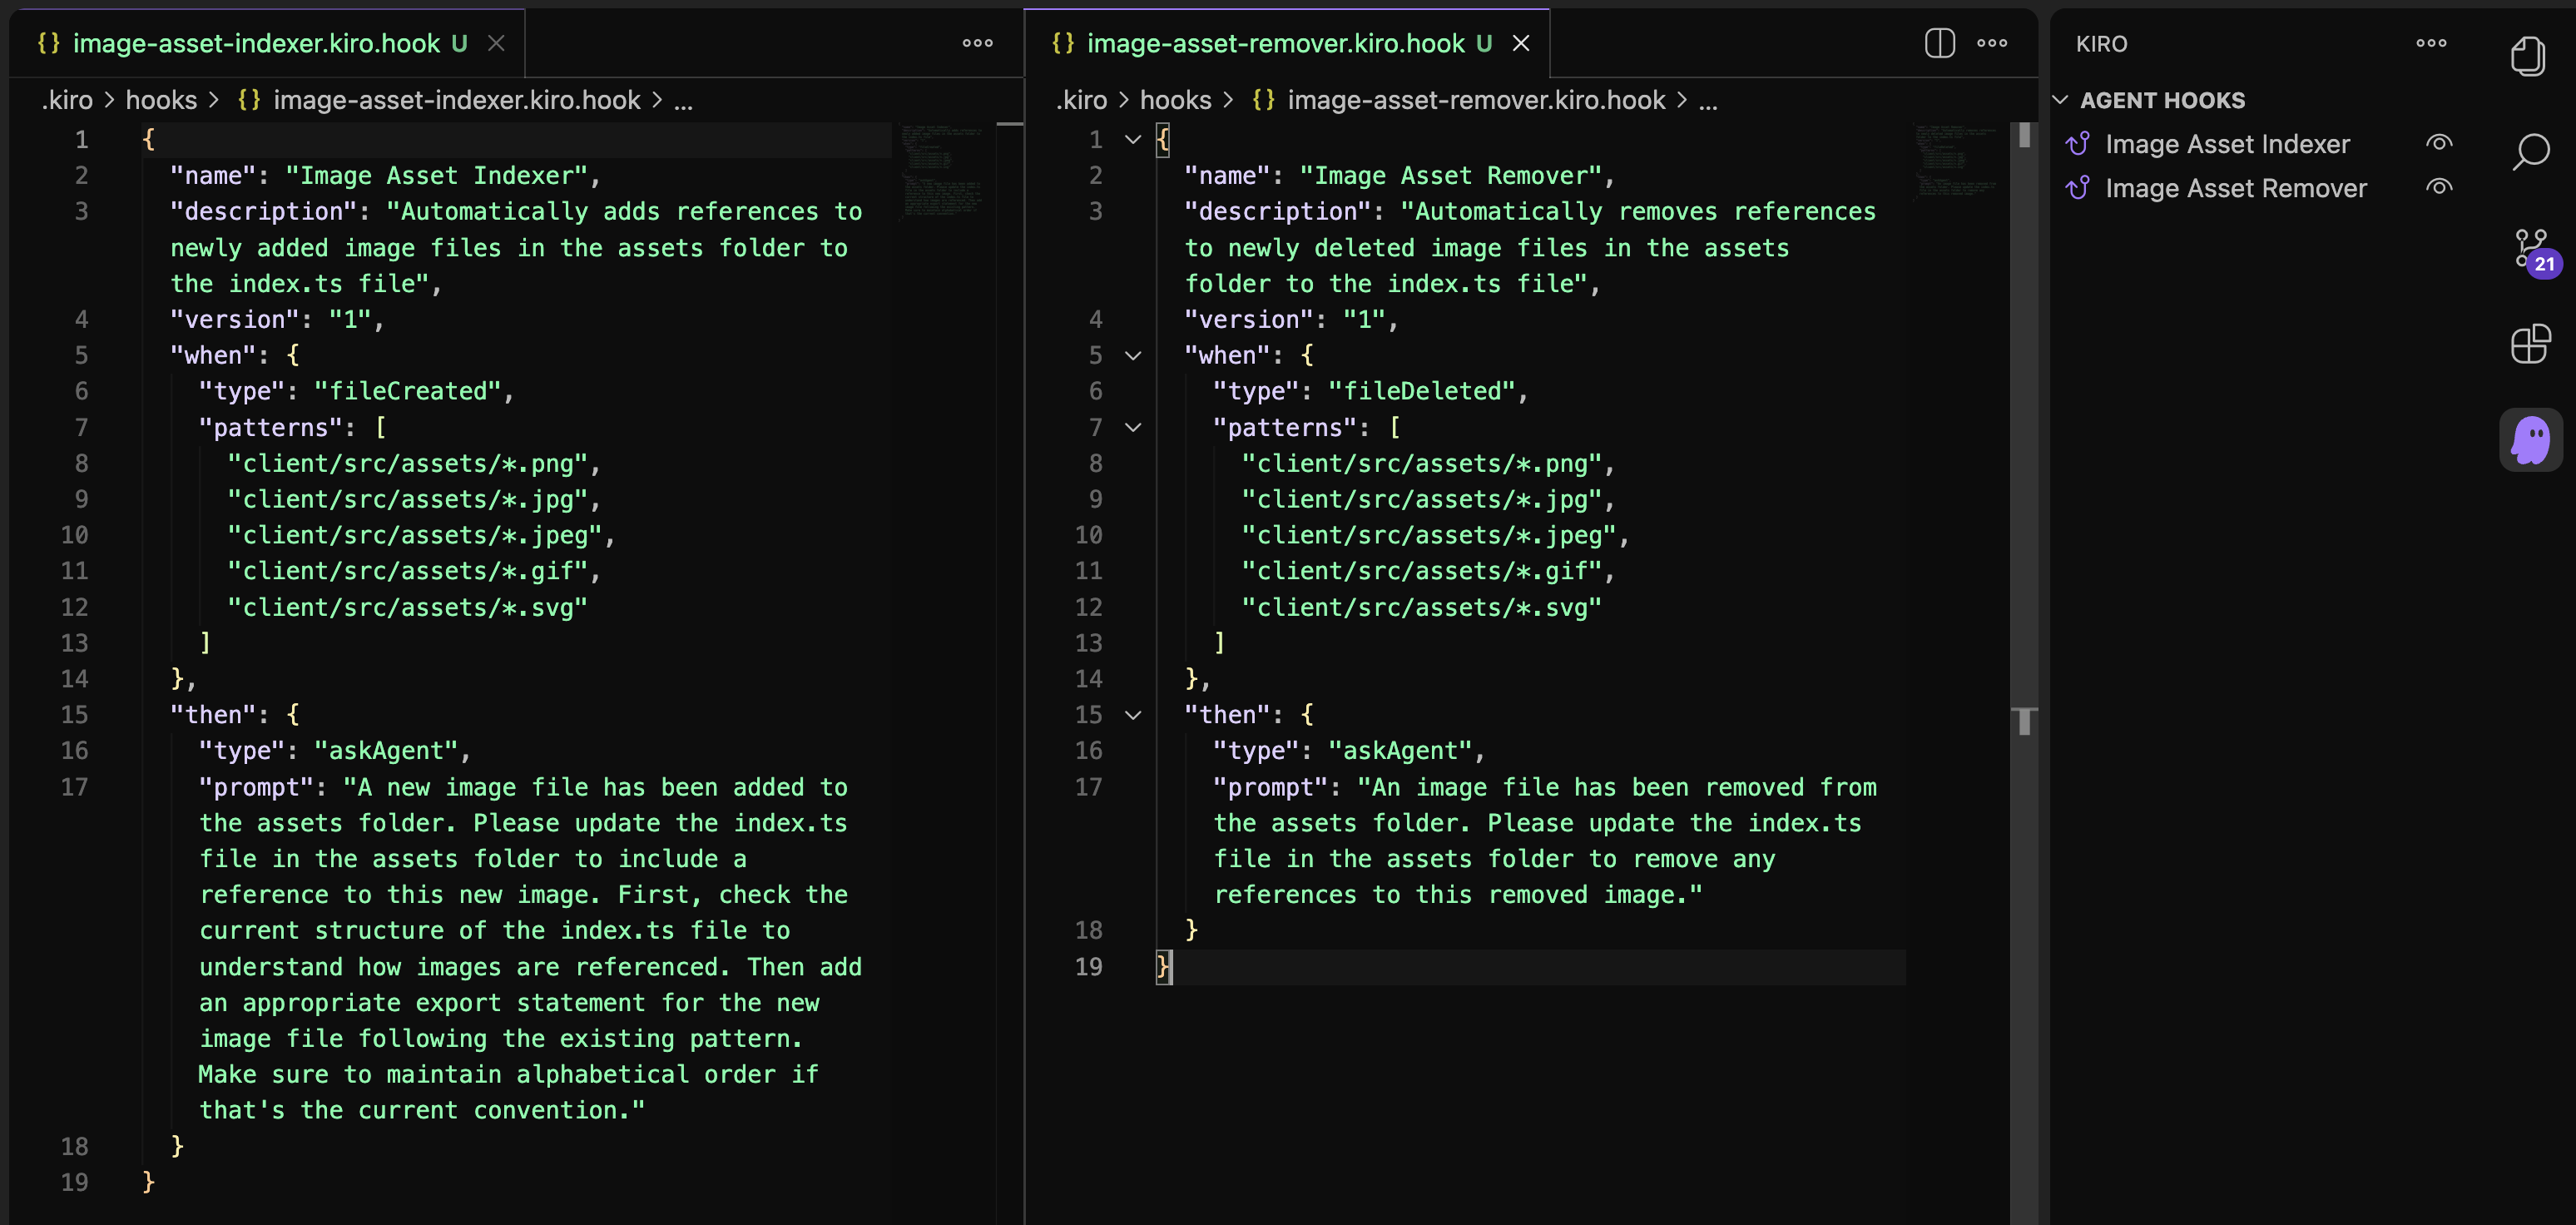
You should now have two hook configurations, and two hooks showing up under "Agent Hooks" in the Kiro panel.
Test the hooks out
Drag and drop an image file into the client/src/assets folder.
You will see the asset indexer hook go to work.
Loading image...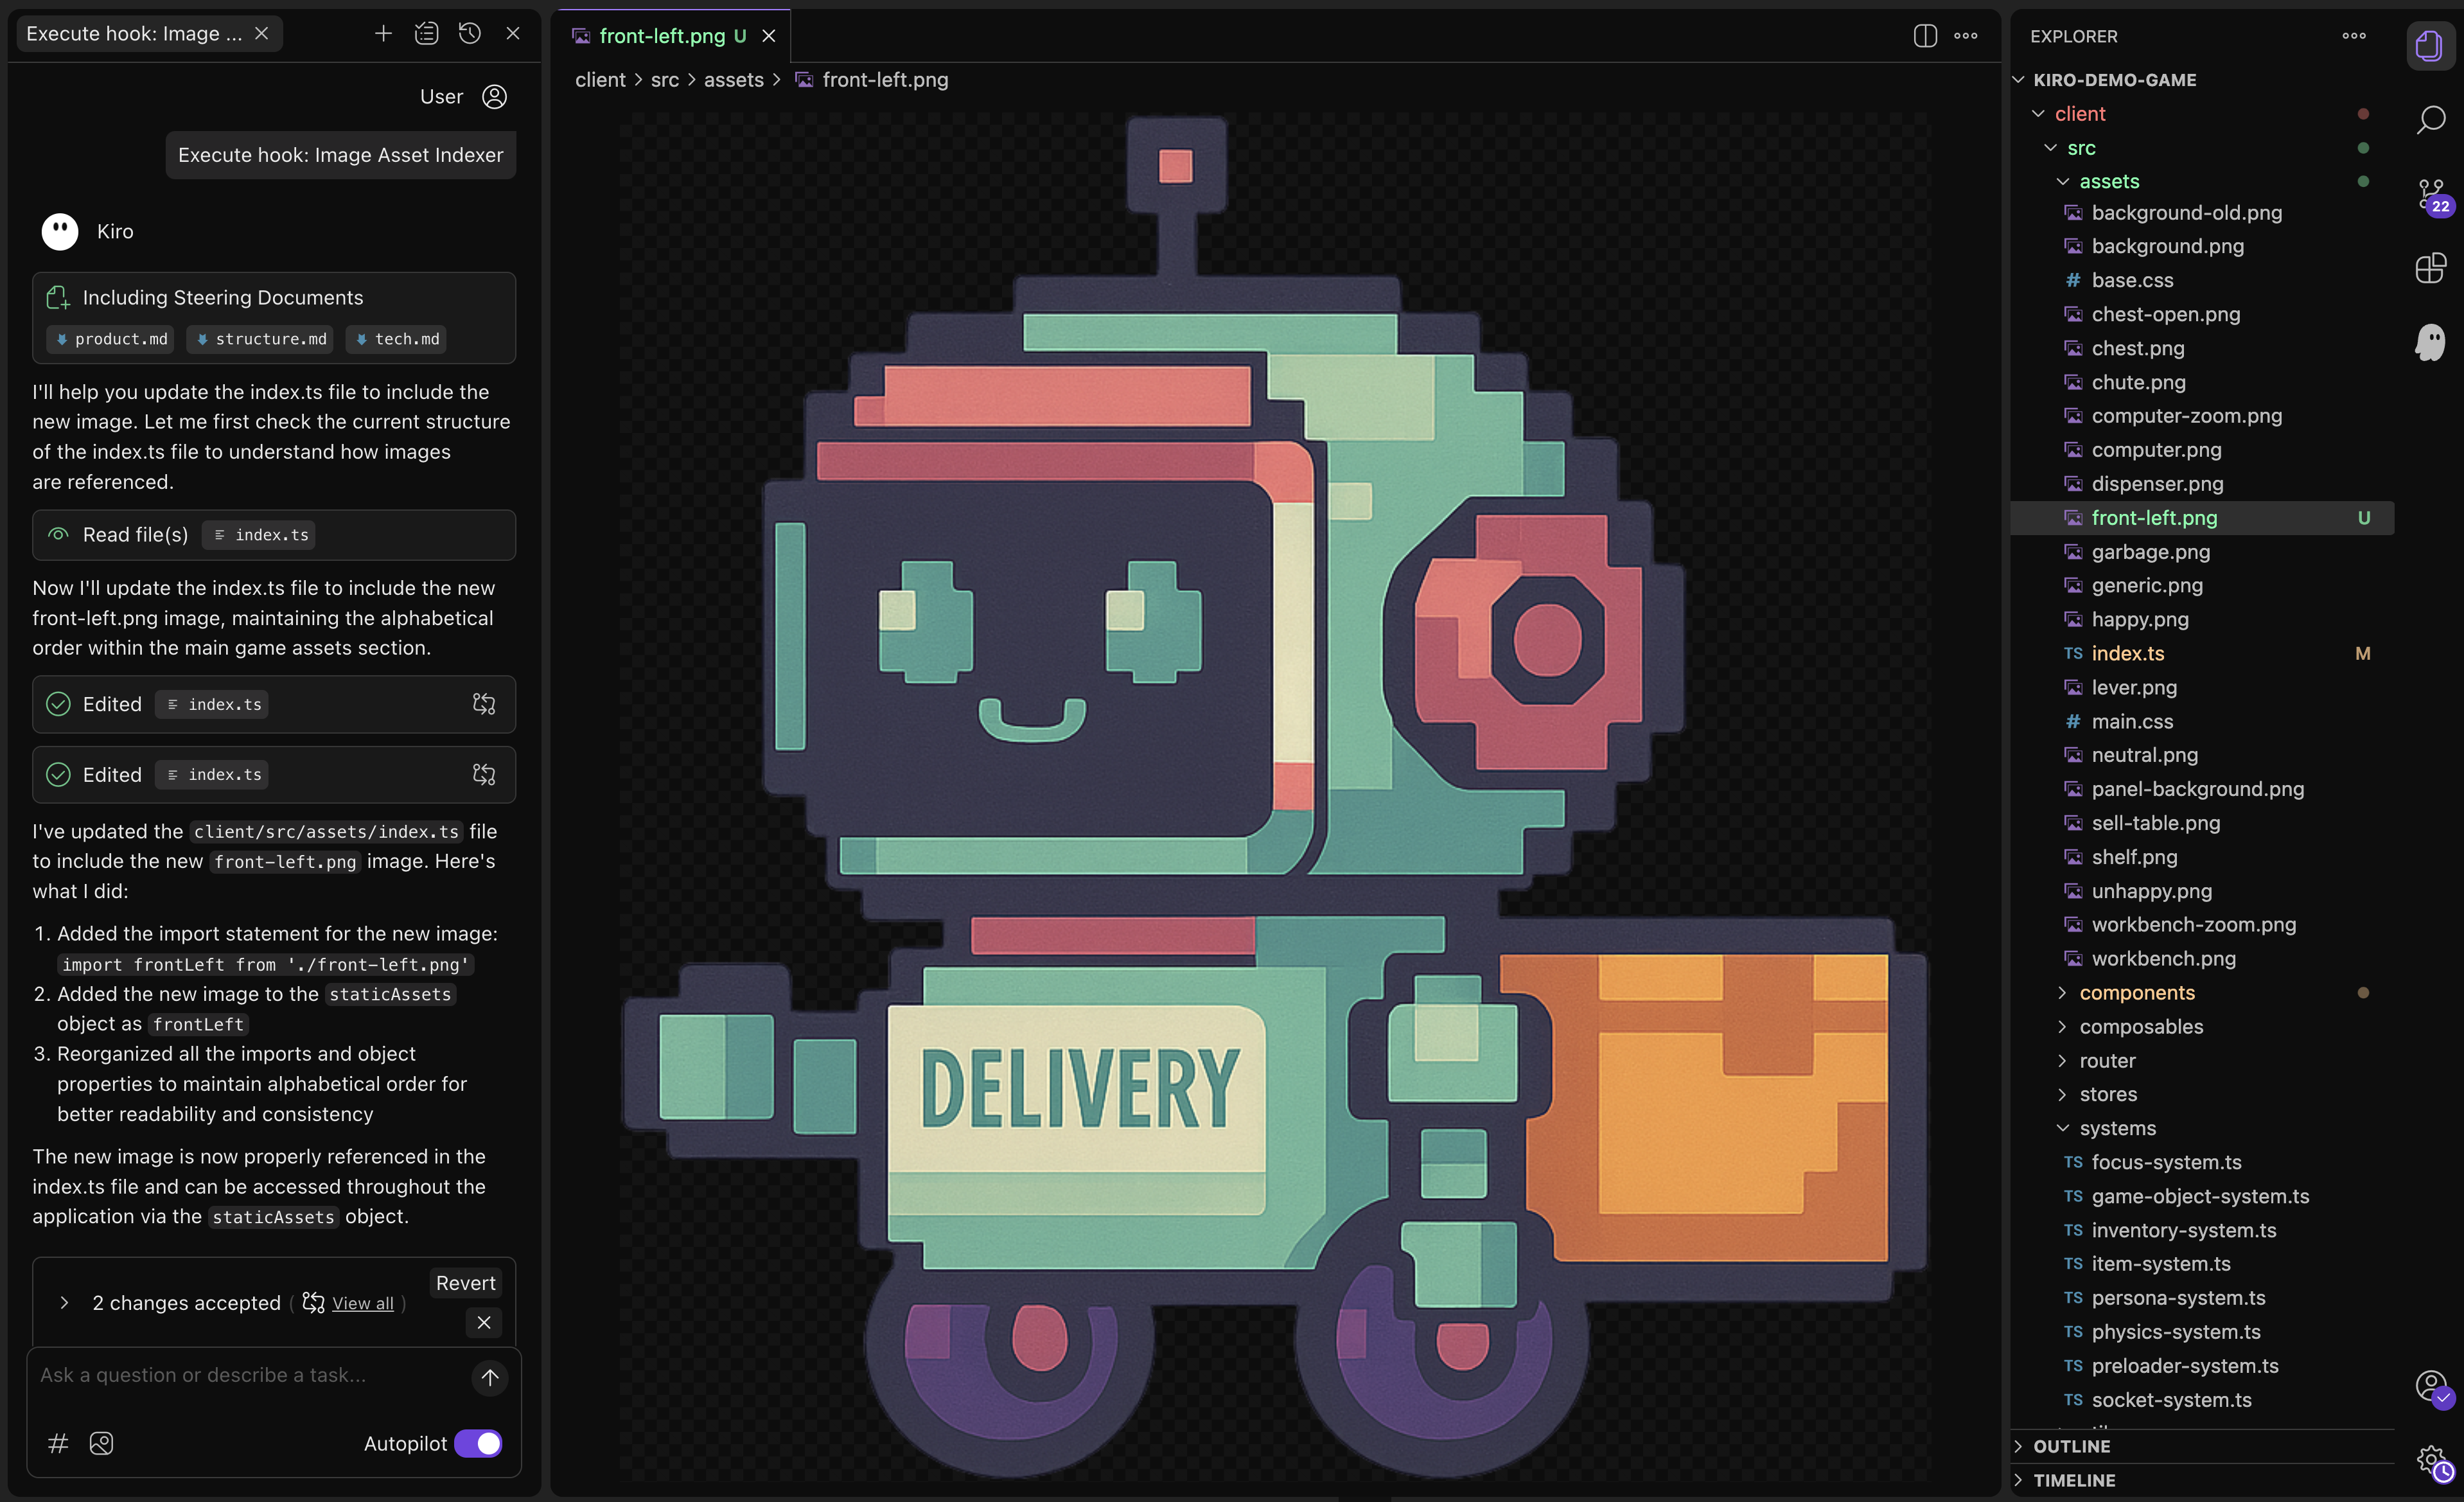
Then delete that asset from the folder.
Loading image...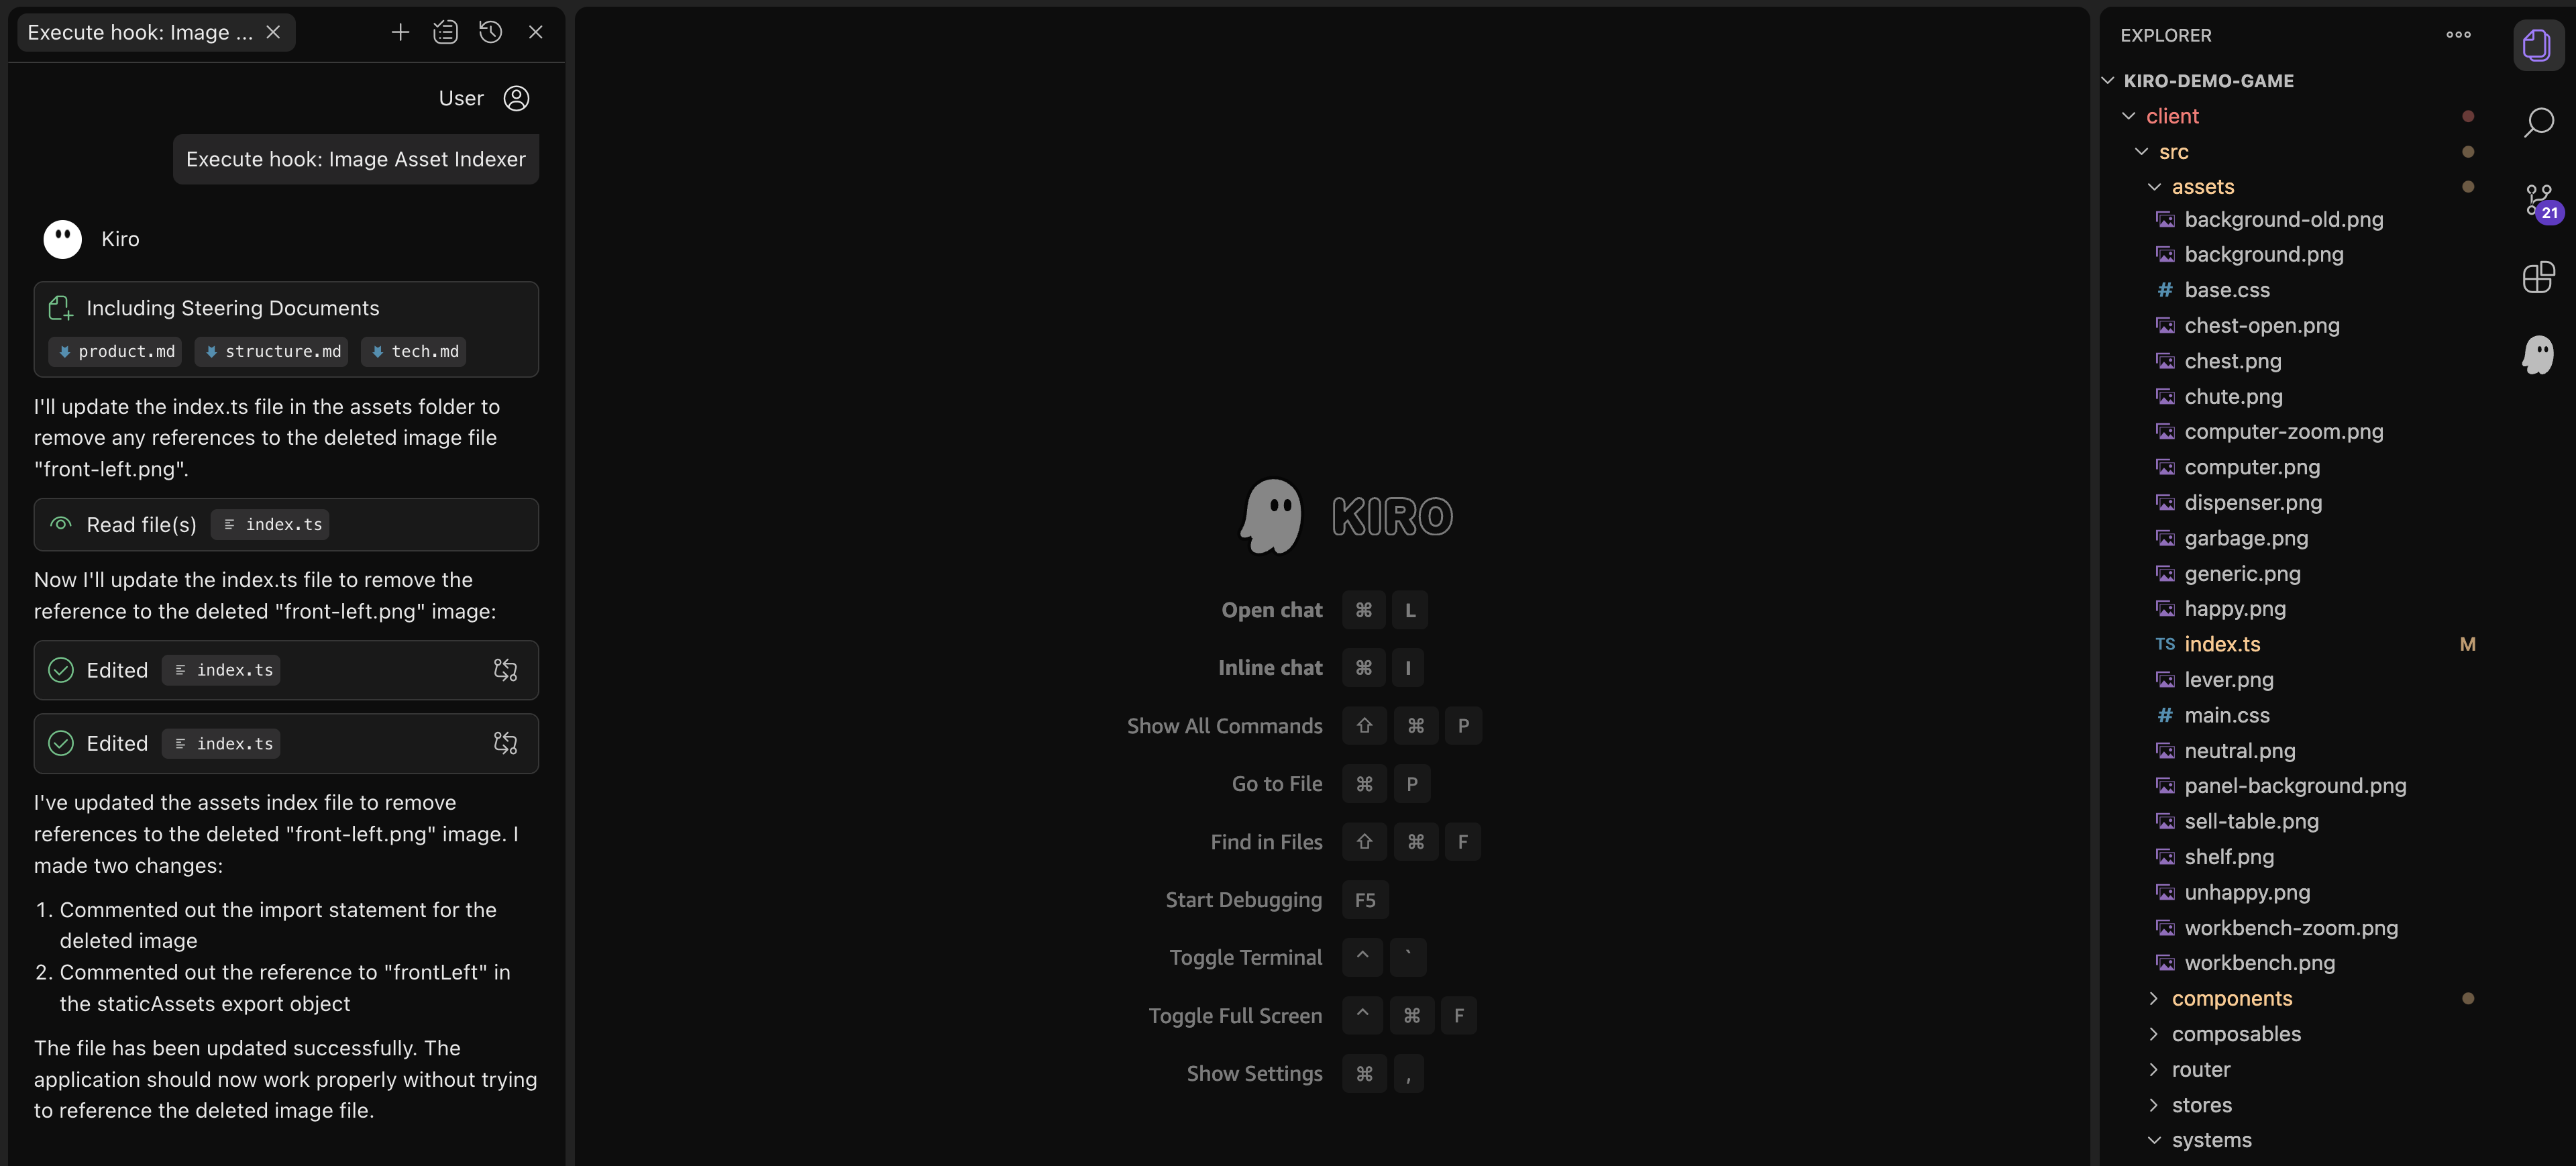
In this module you learned how to create and configure agent hooks to help automate common tasks in your project. These hooks can be used both to save time, and increase accuracy of boilerplate tasks.
Let's move on to the next task:
Managing assets with hooks